
6.5. Customers Management
Introduction
Customer Management - is a module which allows to set custom payment flow. It is located at Settings -> Customers management. This screen contains the list of all Merchants in the system tat are connected to Customers Management.
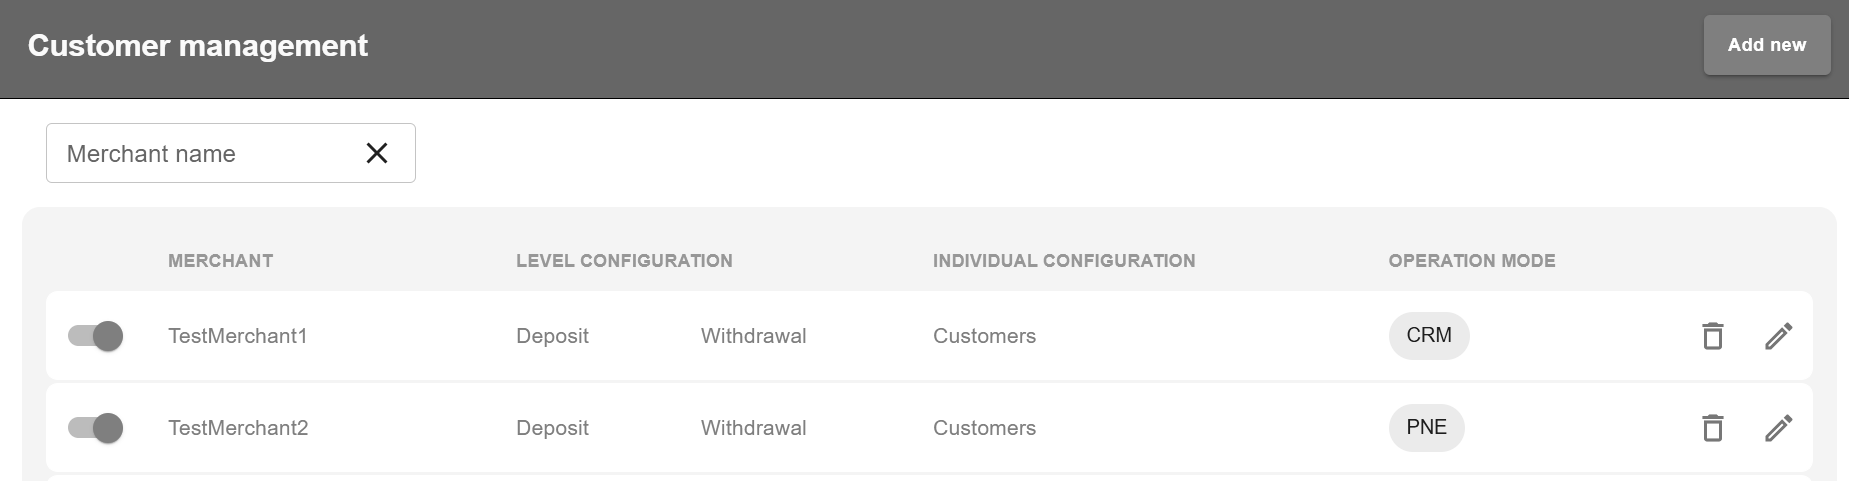
On this screen it is possible to make a search by Merchants or to add new Merchant(Configuration) into the Customer Management module by pressing Add new button on the right top corner of the screen.
Adding New Merchant To Customer Management
After pressing Add new button, this screen will popup:
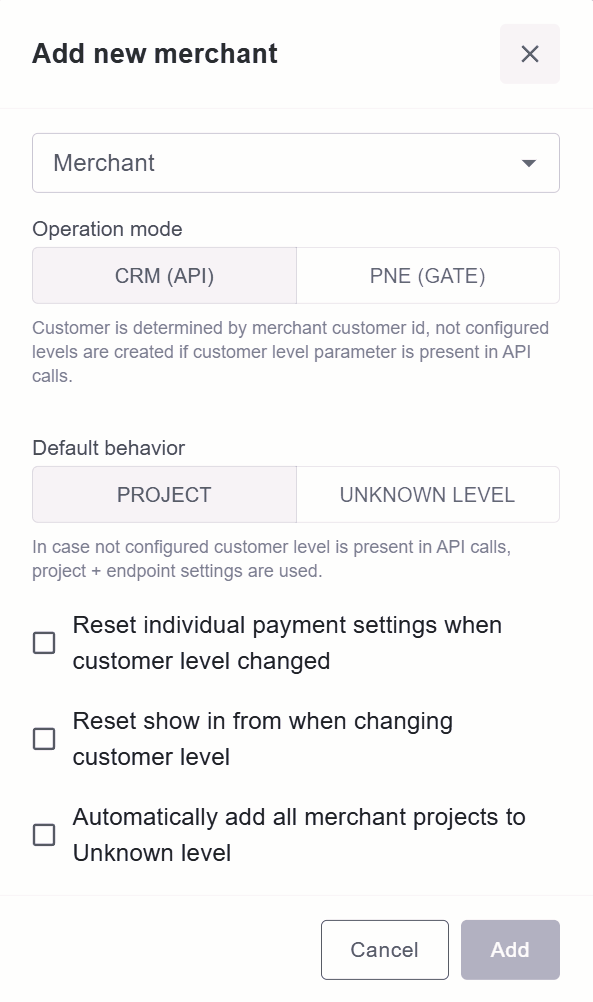
First select the Merchant in Merchant field which will be connected to Customer Management system.
Then select one of the operation mode - CRM(API) or Payment Gateway.
CRM(API) - allows to determine Customer by merchant customer id. Not configured levels are created if customer level parameter is present in API calls.
Payment Gateway - allows to determine Customer by internal customer id.
Warning
Please note that for proper operation, the parameter must match the Client Definition value set on the endpoint or project
In default behavior select either Project or Unknown Level.
Project - In case if not configured customer level is present in API calls, Project and Endpoint settings (Client definition) will be used.
Unknown Level - In case if not configured customer level is present in API calls, Unknown level settings will be used.
Warning
Any misconfiguration may lead to payment processing stop.
After selecting Operation mode and Default behaviour, (by choice) select one of the choices or both:
Reset individual payment settings when customer level changed.
Automatically add all merchant projects to Unknown level
Reset show in from when changing customer level.
After adding Merchant to Customer Management it is possible to edit or delete configuration.
CRM
CRM (API) - allows to determine Customer by merchant customer id.
merchant_customer_identifier
customer_level
Warning
customer_id should not be included in the request.
![title CRM operation mode
start
:(1) Receiving [merchant_customer_identifier] and [customer_level] from Connecting Party;
if (
(2) System will check if such user was already registered in Customer Management.
Does customer with such [merchant_customer_identifier] already exist?
) then (Yes)
:(3) Customer was already registered in
Customer Management.
Customer is being identified by
merchant_customer_identifier;
:(4) Routing will be chosen according to the
level sent in the request.
Customer level in the system will be set equal to
customer_level in request.;
else (No)
:(5) Registering new customer in Customer Management
with id passed in merchant_customer_identifier.
New Customer is being identified by
merchant_customer_identifier;
:(6) Routing will be chosen according to the
level sent in the request.
Customer level in the system will be set equal to
customer_level in request.;
endif
:(7) Routing being adjusted according to level specifications.;
stop](../_images/plantuml-b1553c3a981d045307ad90296290be3843f82e3c.svg)
Warning
Parameters being sent improperly could lead to transactions being incorrectly routed or not being processed entirely.
Payment Gateway
PNE (GATE) - allows to determine Customer by internal customer id.
customer_id
customer_level
Warning
merchant_customer_identifier should not be included in the request.
![title PNE (GATE) operation mode
start
:(1) Receiving [customer_id] and [customer_level] from Connecting Party.;
if (
(2) System will check if such user was already registered in Customer Management.
Does customer with such [customer_id] exist?
) then (yes)
:(3) Customer was already registered in
Customer Management.
Customer is being identified by customer_id;
:(4) Routing is chosen according to the
level of customer in Customer Management.
Customer level in the system will be set equal to
customer_level in request.;
else (No)
:(5) In case of customer with customer_id value sent in the request
have not been found in Customer Management, routing rules
won't be applied.;
endif
:(7) Routing being adjusted according to level specifications;
stop](../_images/plantuml-79a1c5d65577341d4db9defbd9ec76c8e19571eb.svg)
Warning
Parameters being sent improperly could lead to transactions being incorrectly routed or not being processed entirely.
If Auto leveling is enabled for the Merchant, Customer level can also change automatically based on accumulated transaction history, independently of this request flow — see Auto Leveling.
Level Configuration
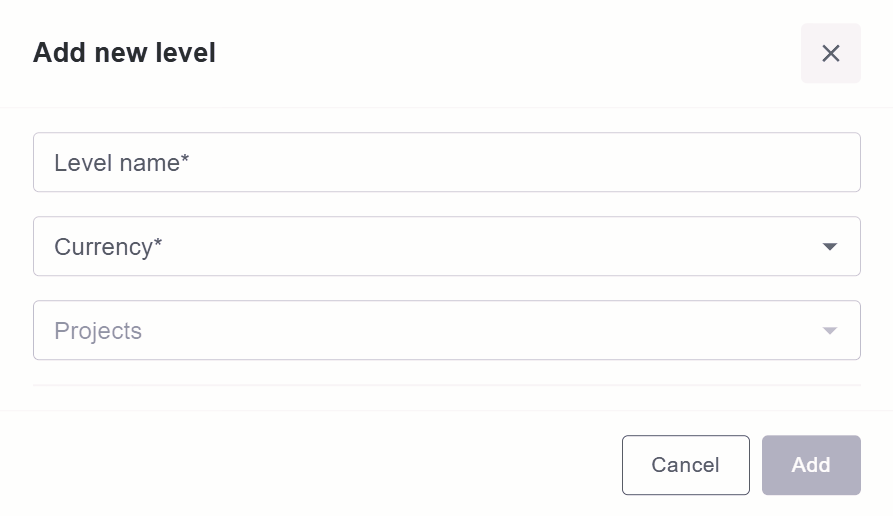
Level configuration can be done for Deposits and Withdrawals. In order to add configurations press +Add button and select the name, currency and projects.
Note
The currency may vary based on the currencies in which the Merchant’s Projects are available.
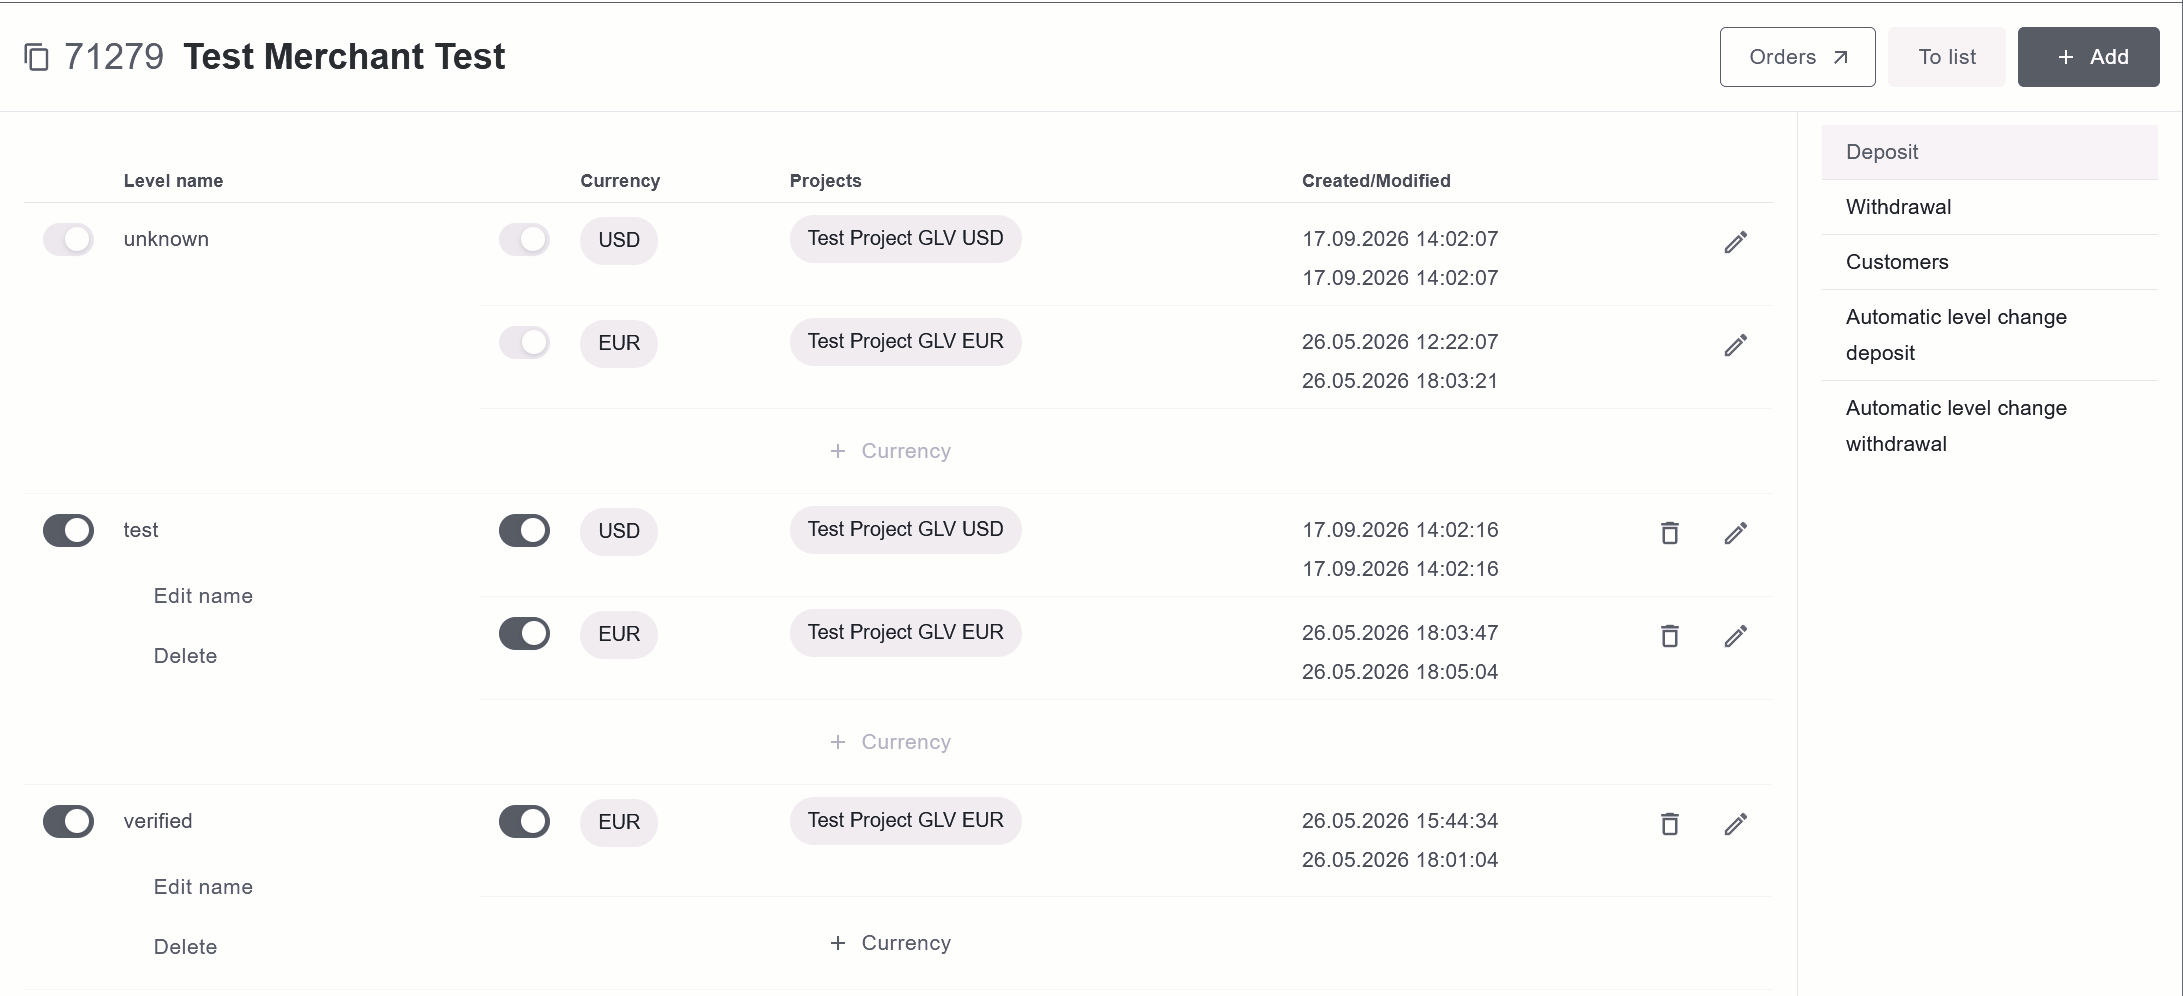
unknown is a default level that will be created automatically.
On the screen shown above, all levels will be displayed with the next information:
Level name
Currency - supported currencies on the level
Projects - all Merchant’s projects that are connected to Customer Management.
Created and Modified - which will show the time - configuration was created or modified.
Configuration for a specific currency can be toggled on/off or whole configuration can be deleted. Press edit button to add/remove projects from level.
Customer level configuration
Press on Level Name to access Customer level configuration. In opened window select Level configuration to setup custom payment flow for Customer level or Filters to add additional checks for level.
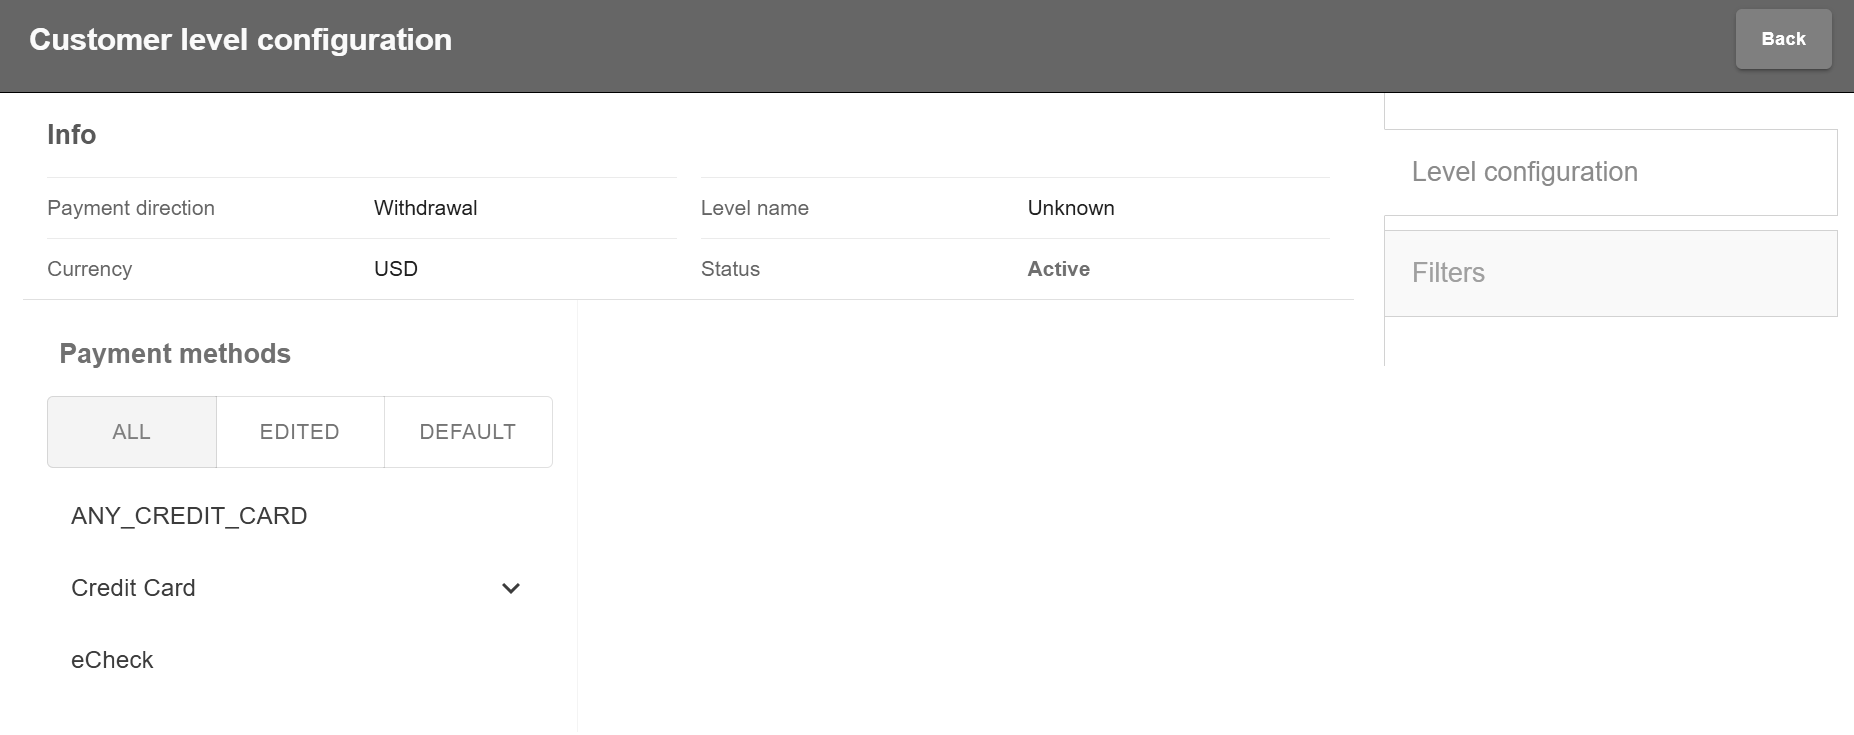
This screen will display information about level such as - Payment direction - Deposit or Withdrawal, Currency, Level name, Status - which shows the status of level (active/disabled).
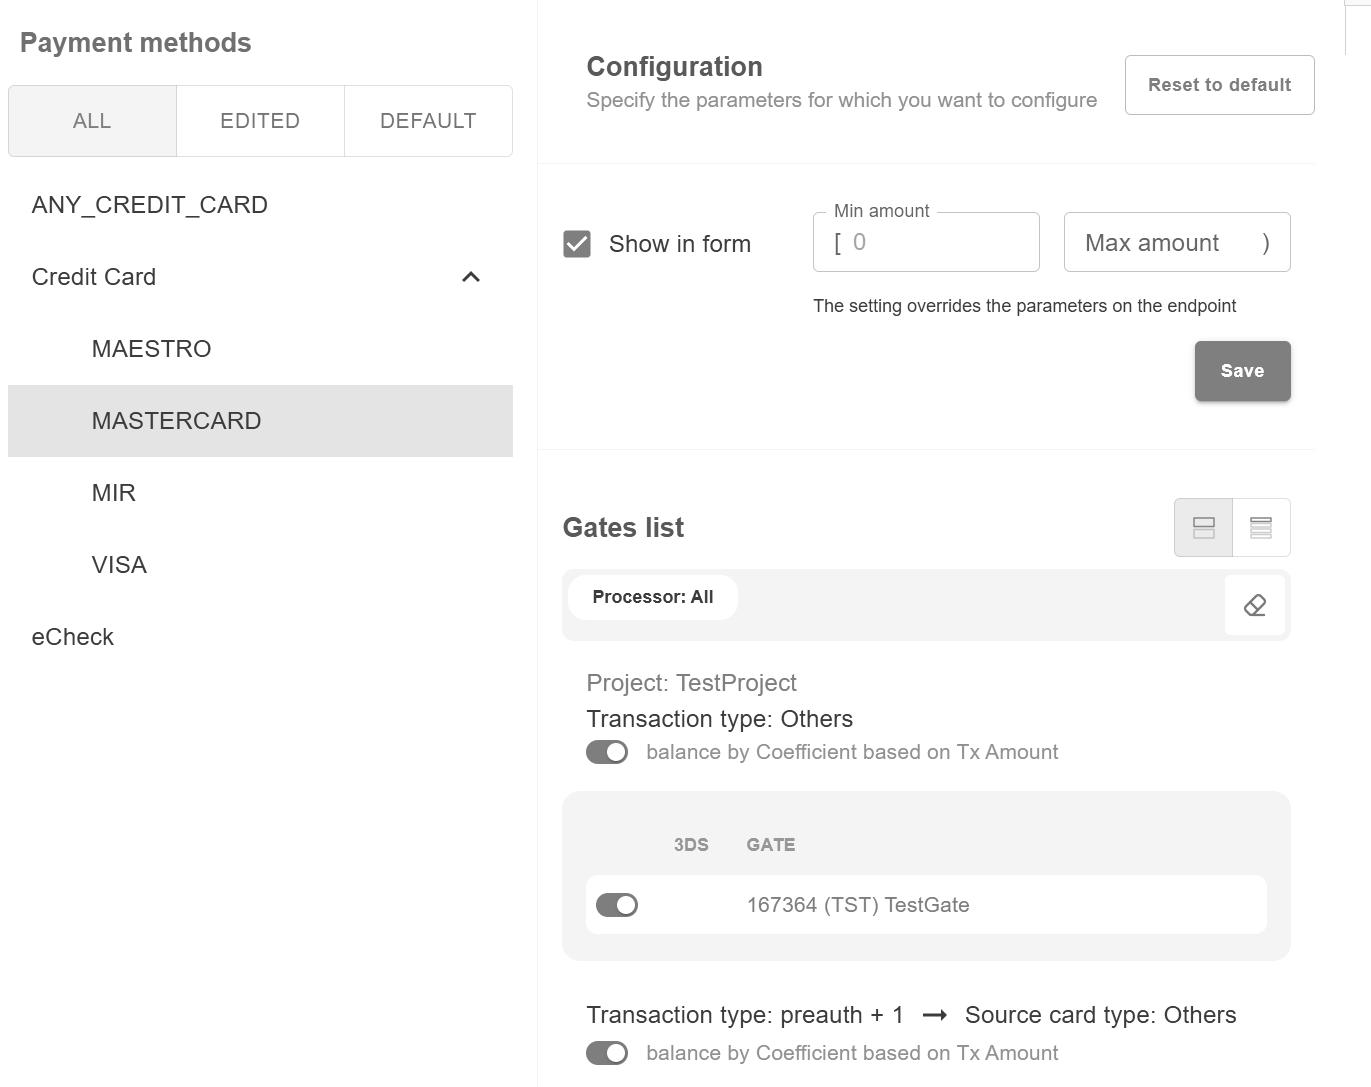
In Payment methods section all available methods for Payment Cashier will be displayed. By pressing on any of the methods Configuration window will popup.
Auto leveling
Auto leveling allows Customer level to be changed automatically, based on configured rules, without manual intervention from Manager.
Note
Auto leveling is only available when Customer Management is configured in Payment Gateway (PNE) operation mode. Transactions are being counted only for card/email Client Definition configurations on Endpoint/Project.
Rules are configured separately for Deposit and Withdrawal payment directions.
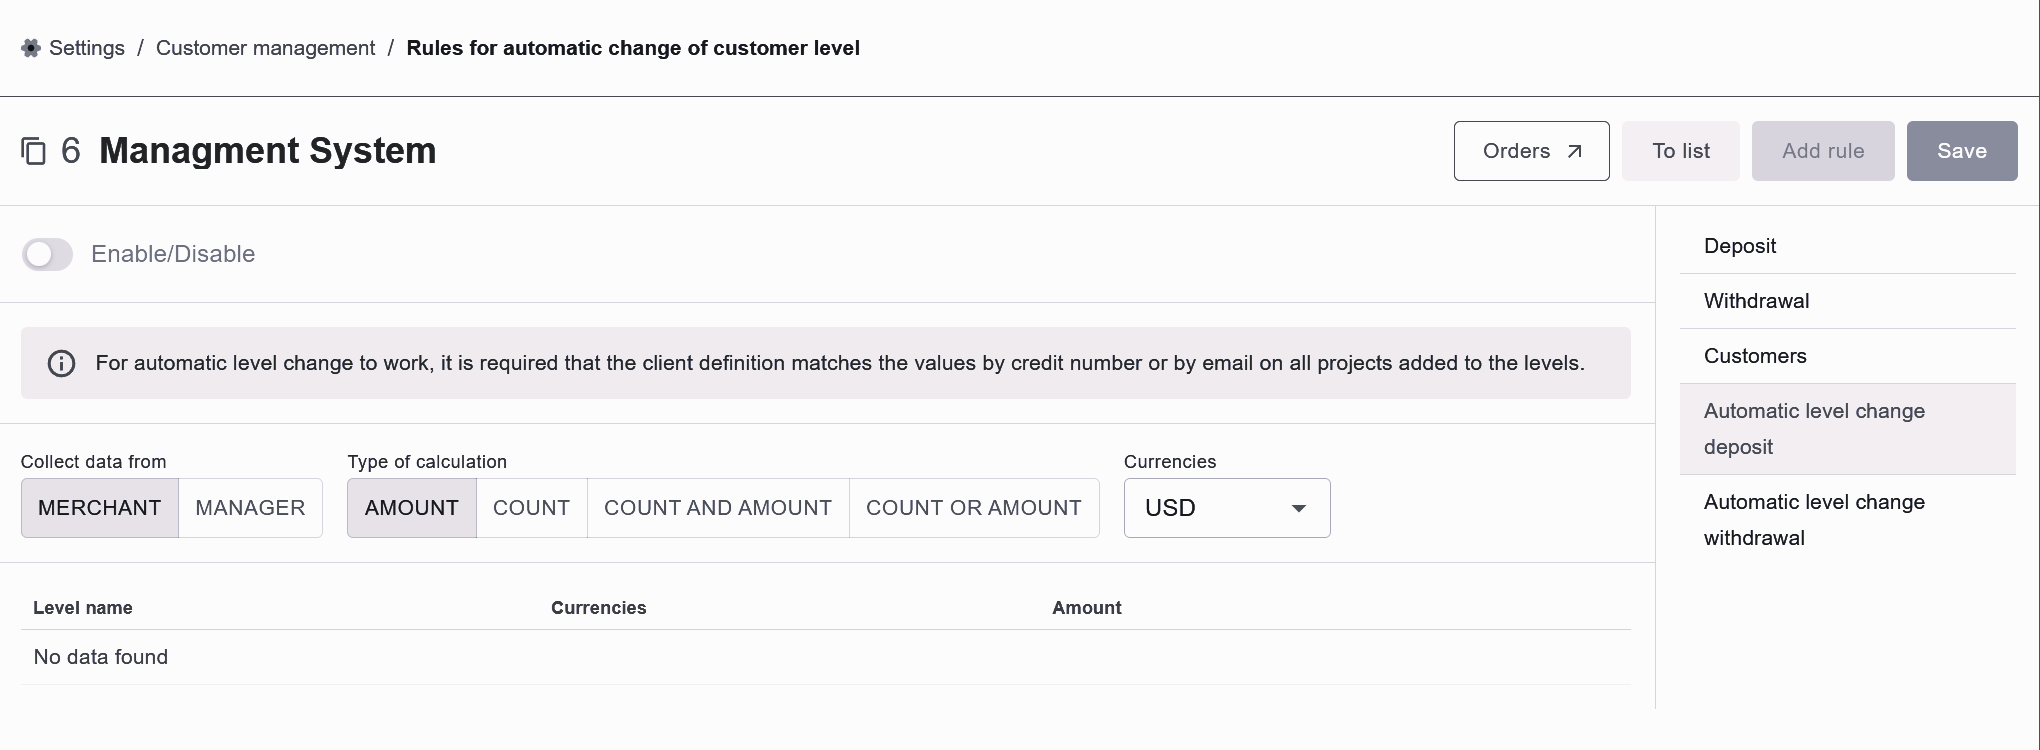
Collect Data from - selects the entity whose transaction history is used to calculate the rule: Merchant or Manager.
Type of calculation - selects which transaction metric triggers the level change: Count, Amount, Count and Amount or Count or Amount.
Note
Currency selection is only available for Amount, Count and Amount and Count or Amount types of calculation.
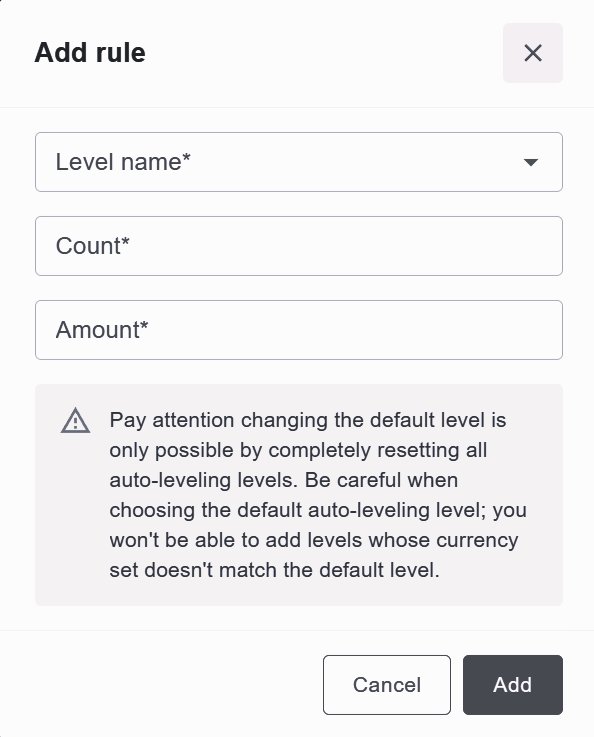
For each level added to the rule, Level name should be selected, together with the threshold value(s) required for Customer to reach that level, depending on the selected Type of calculation.
Warning
Customer level is changed by only one level at a time, even if the transaction count/amount would be enough to cover several levels in the line. Transactions are counted within a rolling 180-day window from the last level change, and any amount exceeding the current level’s threshold is carried over towards the next level for the remainder of that window. Auto leveling does not automatically downgrade a Customer level.
New Customers tracked under an Auto leveling rule are assigned the first level of the rule’s line, rather than the unknown level, since unknown remains a technical level for projects not connected to a rule.
Note
This behaviour applies only to Customers created under an Auto leveling rule and does not change the Default behaviour (Project / Unknown Level) configured for the Merchant.
Filters
Transaction filters in System are intended for rejection of certain transactions on various reasons.
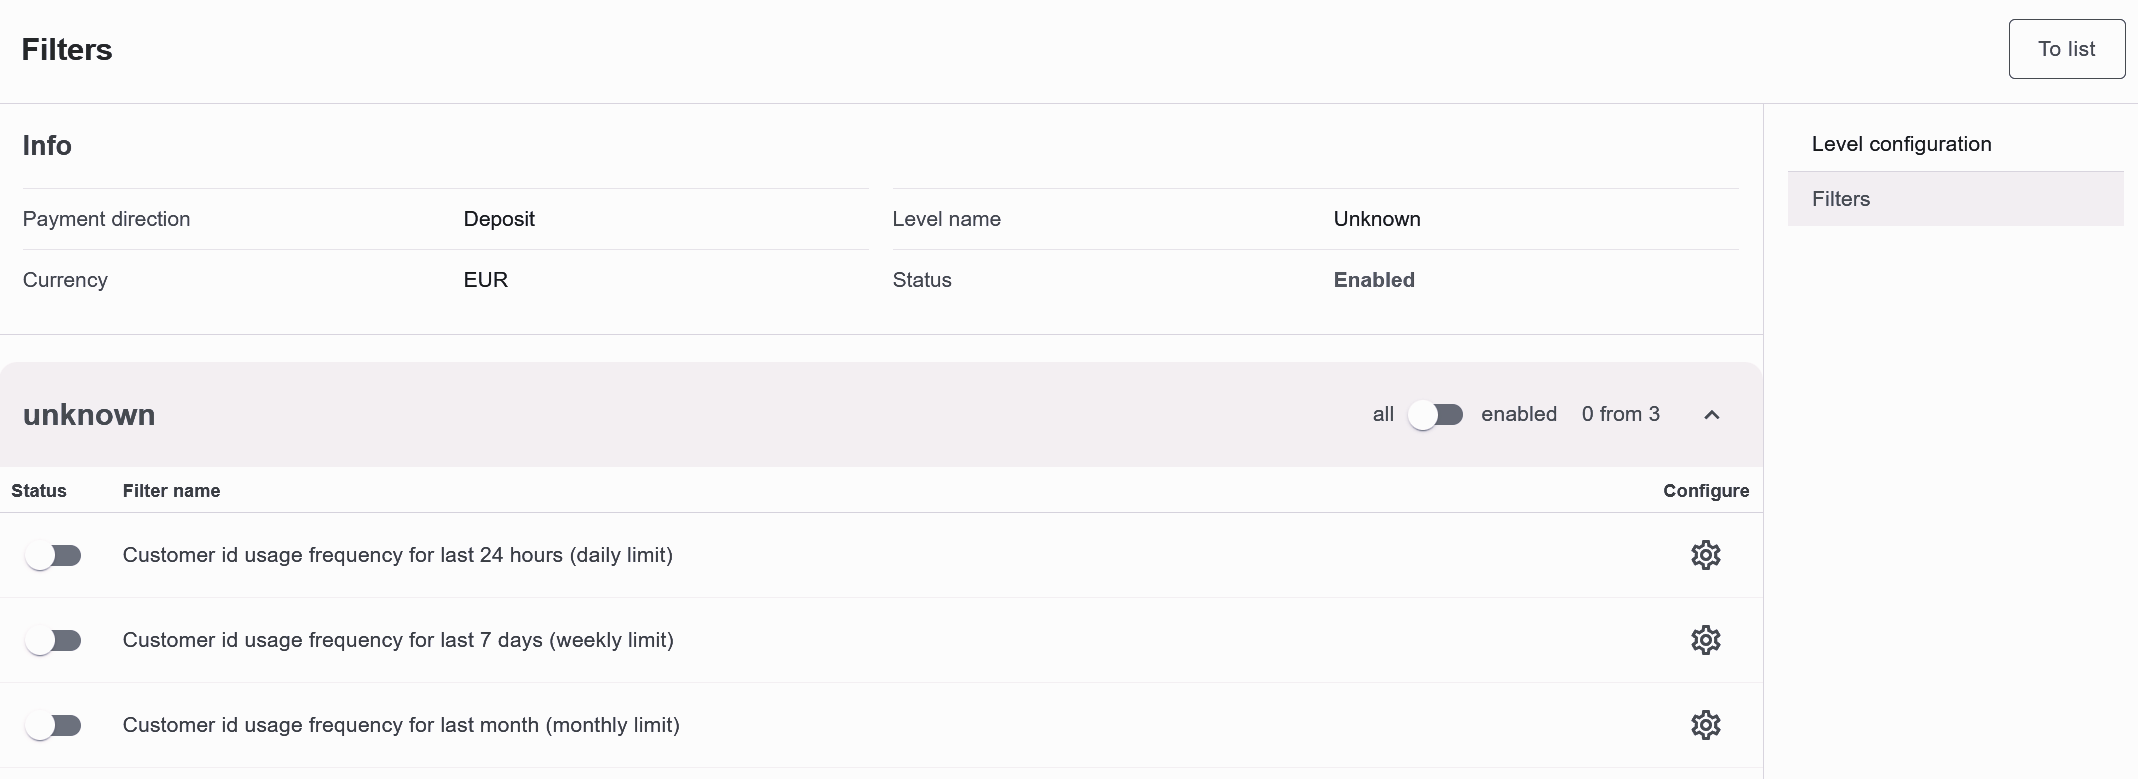
There are three level filters:
Сustomer id usage frequency for last 24 hours (daily limit)
Сustomer id usage frequency for last 7 days (weekly limit)
Сustomer id usage frequency for last month (monthly limit)
Name |
Description |
Value |
|---|---|---|
amount limit |
maximum total transactions amount for the last 24 hours (week, month) for exact Customer id |
99999 |
calendar week starts from Sunday |
“Yes”: calendar week starts from Sunday,
“No”: calendar week starts from Monday
|
Yes/No |
for all merchant currencies in CMS |
current total transactions amount or count for the last 24 hours (week, month) for this customer id would be calculated “Yes”: for all merchant levels in all currencies in payment direction (Deposit or Withdrawal) and converted to the currency of the current level for comparison with the amount limit “No”: for current level only |
|
quantity limit |
maximum total transactions count for the last 24 hours (week, month) for exact Customer id |
99999 |
subtract Cancel transactions |
||
use calendar day |
Error codes
# |
Code |
Name |
|---|---|---|
19000 |
Daily amount limit exceeded for customer id |
|
19001 |
Daily quantity limit exceeded for customer id |
|
19002 |
Weekly amount limit exceeded for customer id |
|
19003 |
Weekly quantity limit exceeded for customer id |
|
19004 |
Monthly amount limit exceeded for customer id |
|
19005 |
Monthly quantity limit exceeded for customer id |
Customers
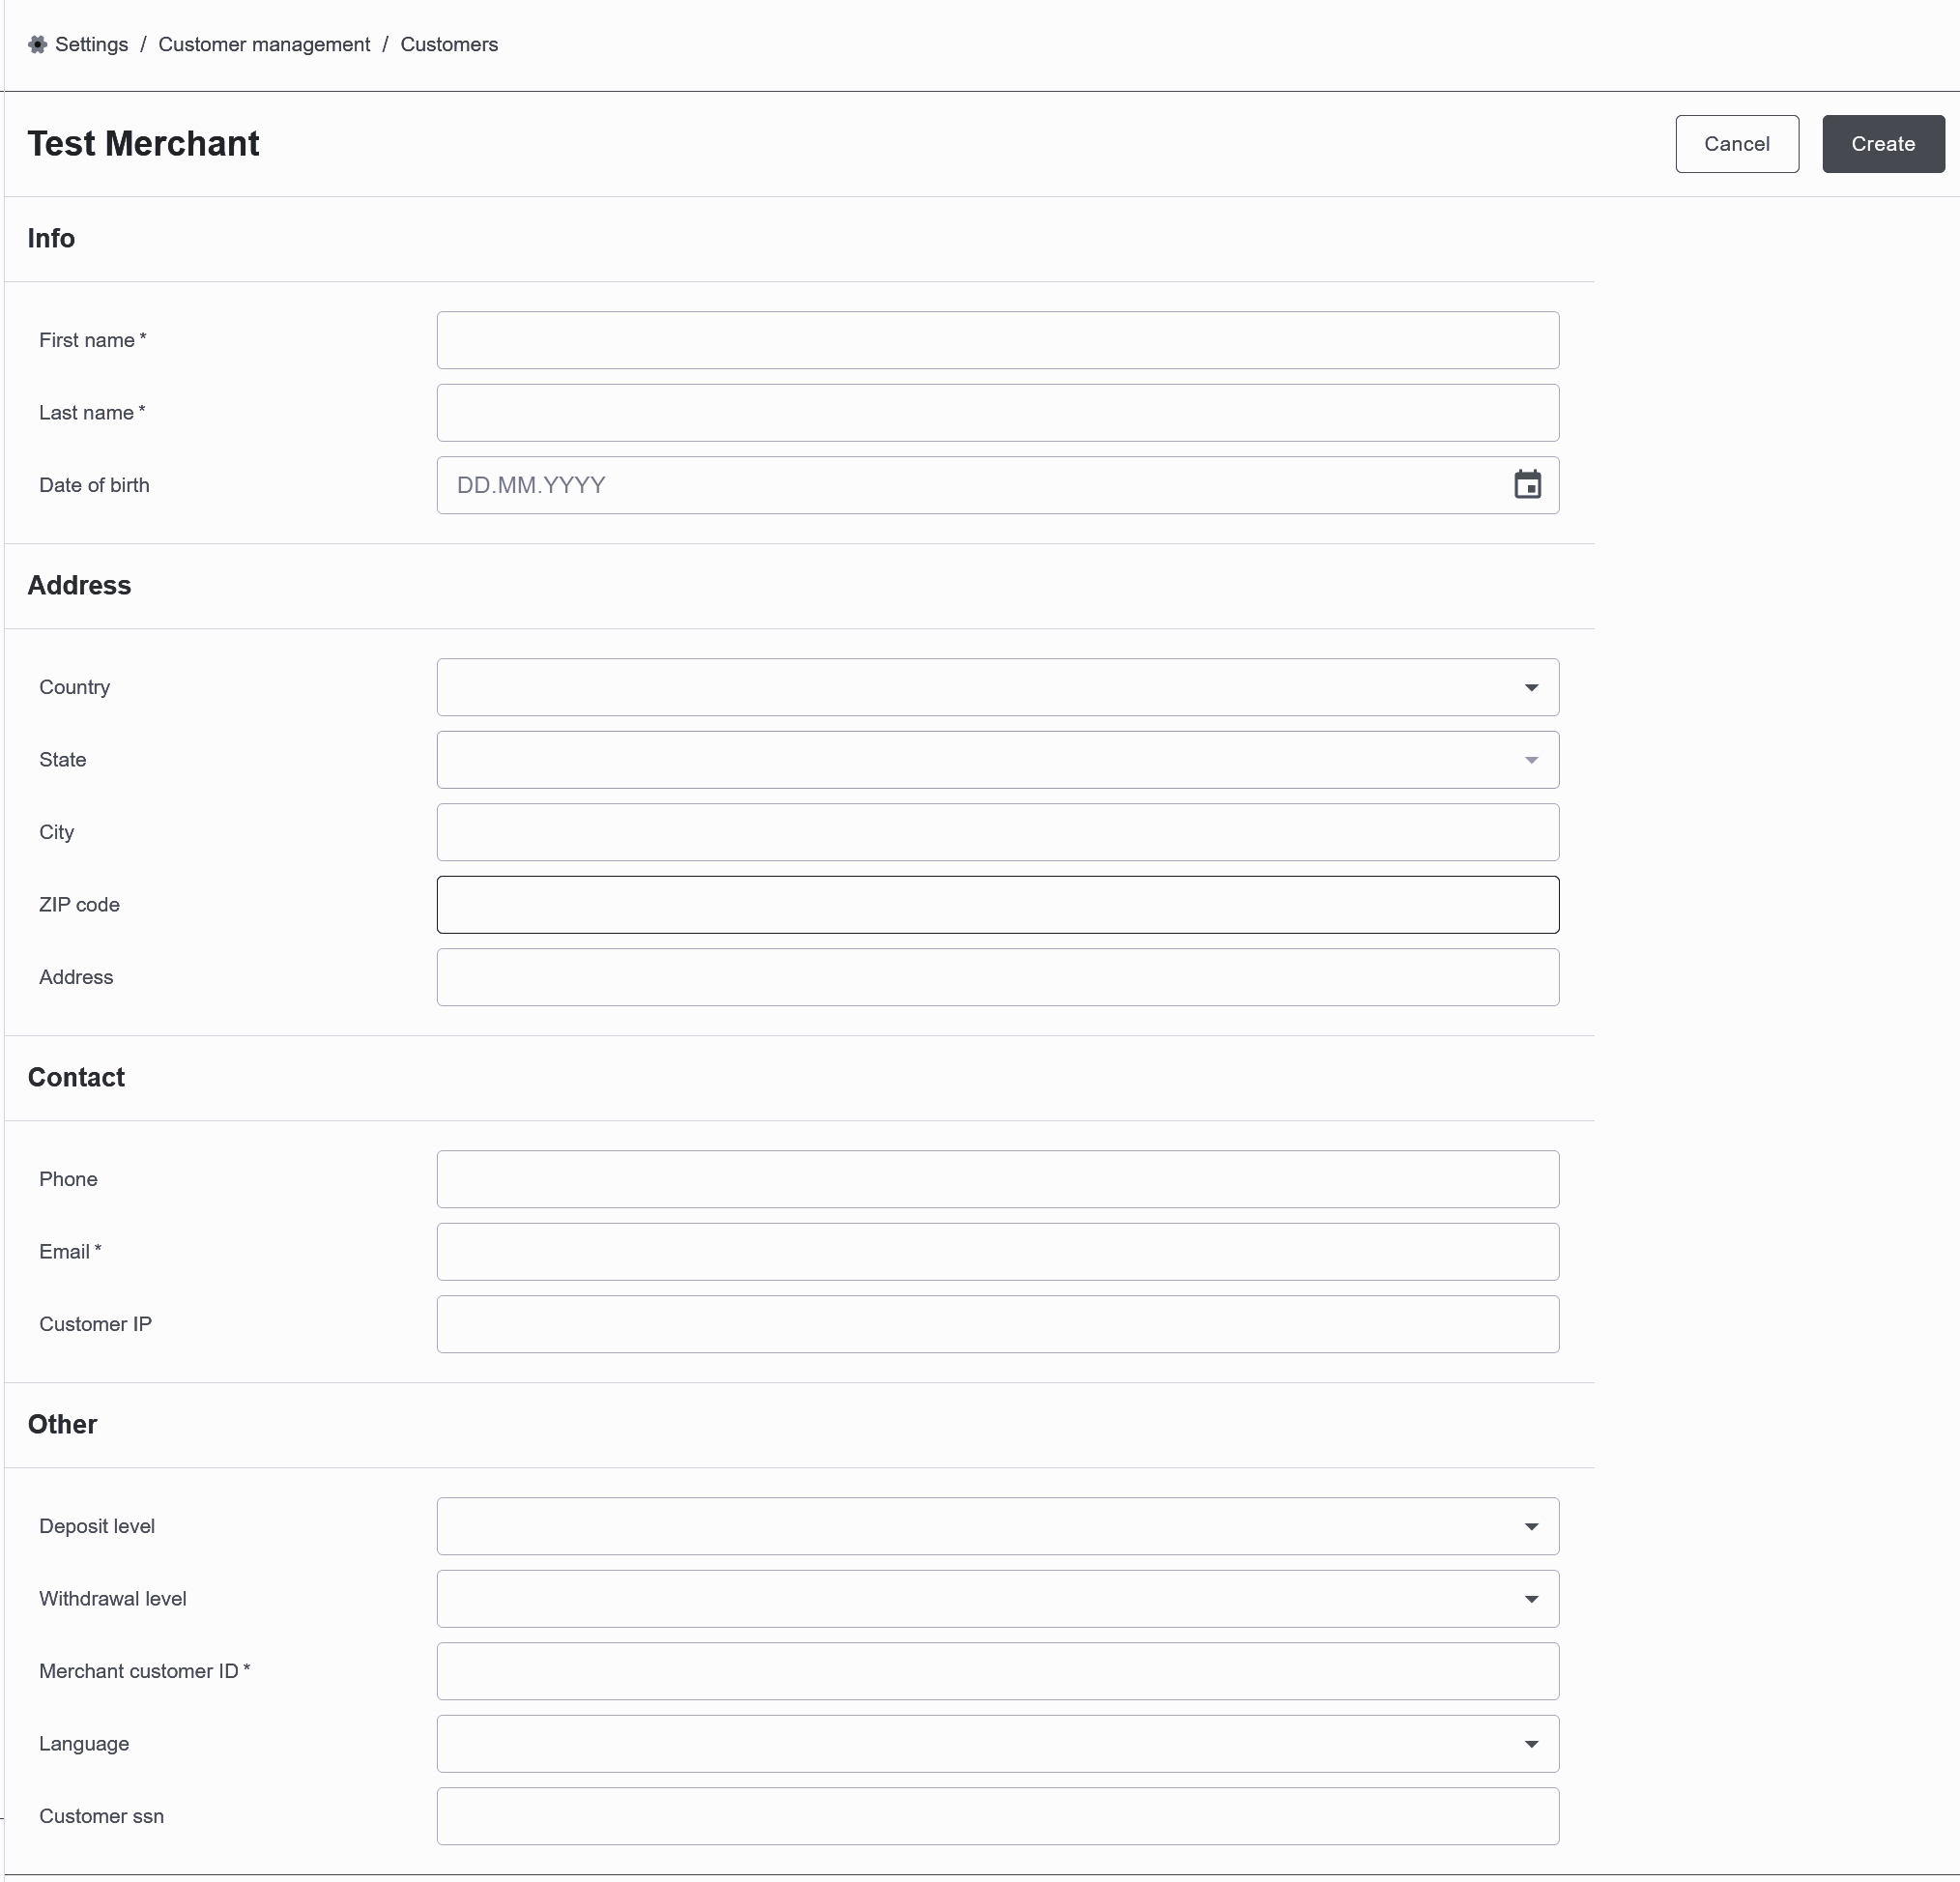
Individual configuration can be done for Customers. Depending on the parameter that were sent (customer_id, customer_level, merchant_customer_identifier), customer can be created automatically or manually through Customers screen. Press on Customers in order to access the Customers screen.
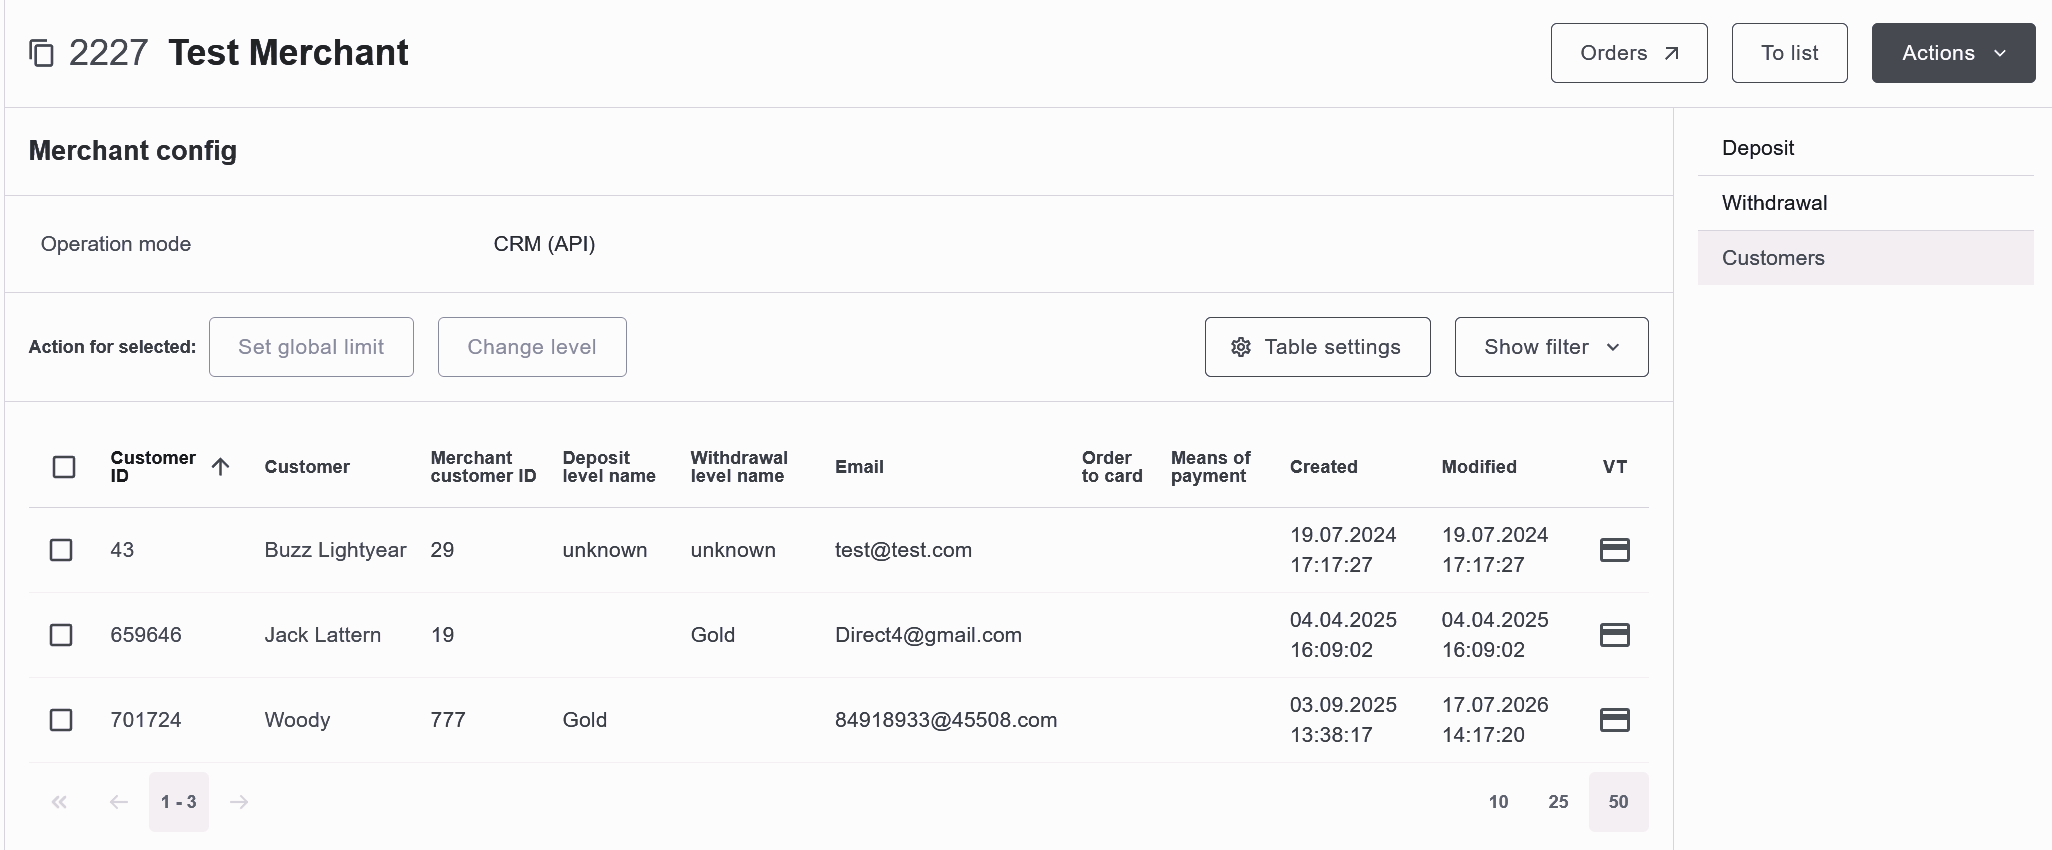
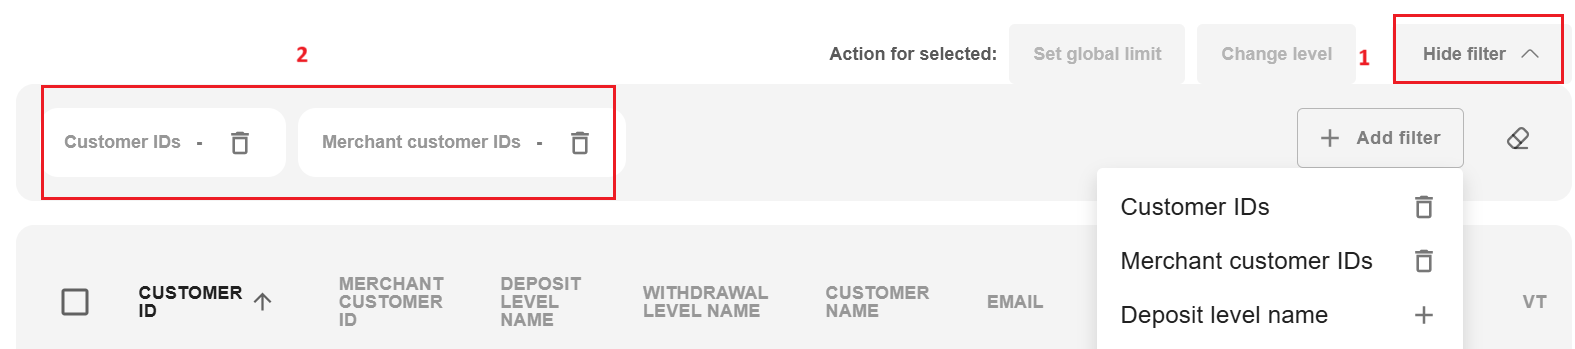
As shown on the image above, press 1 - Show filter to open additional criterion for search. In popp up screen select next criterion: (Payment Gateway’s) Customer IDs, Merchant Customer IDs, Deposit level name, Withdrawal level name, Email or Date range (creation dates).
Select group of customers or all of them to Set global limit or Change level - for all selected customers.
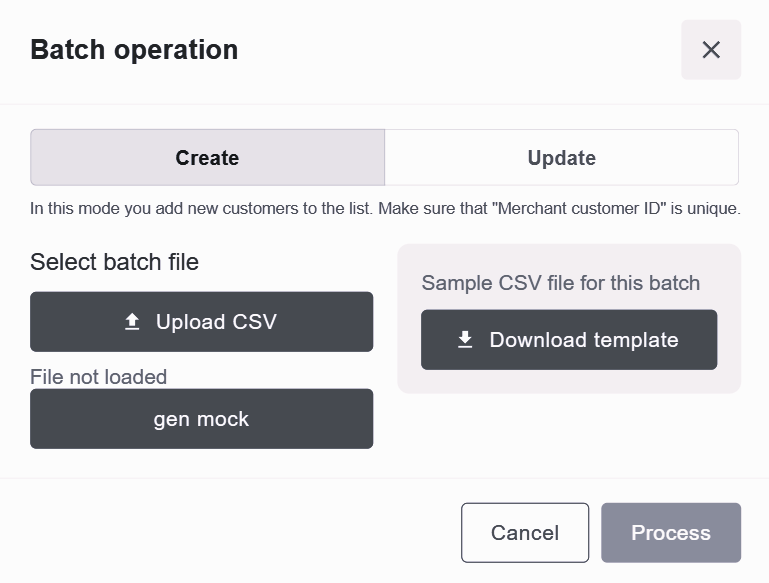
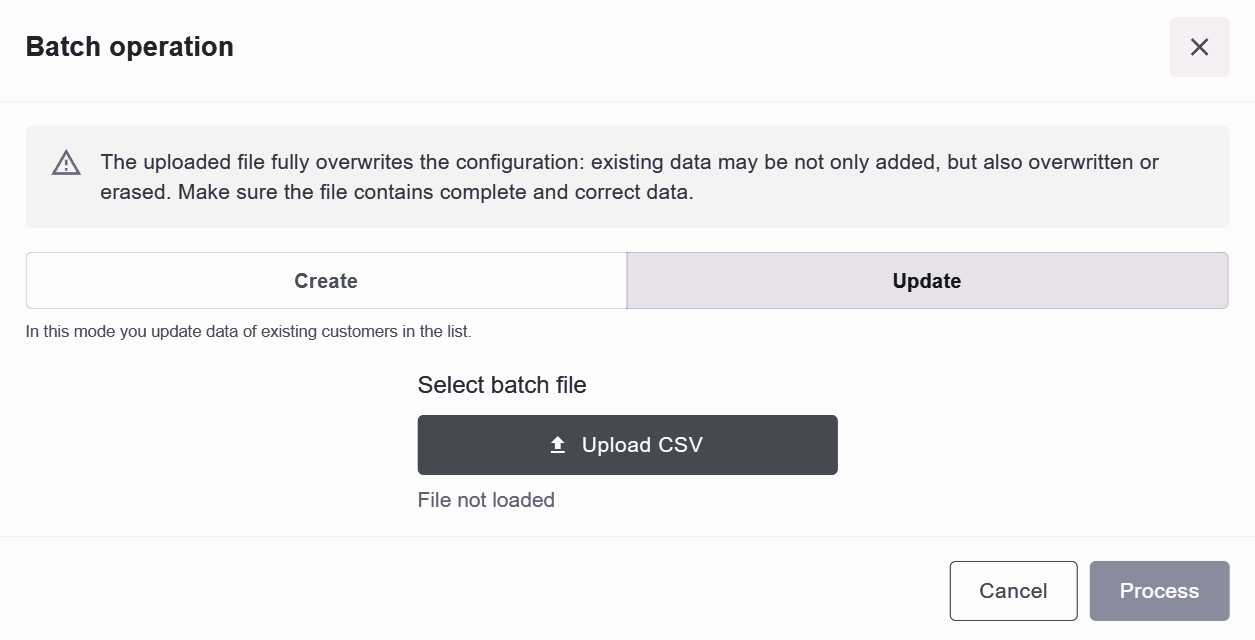
Note
The uploaded file fully overwrites the configuration: existing data may be not only added, but also overwritten or erased. Make sure the file contains complete and correct data.
Common Settings
By pressing on any customer’s ID next window will pop-up:
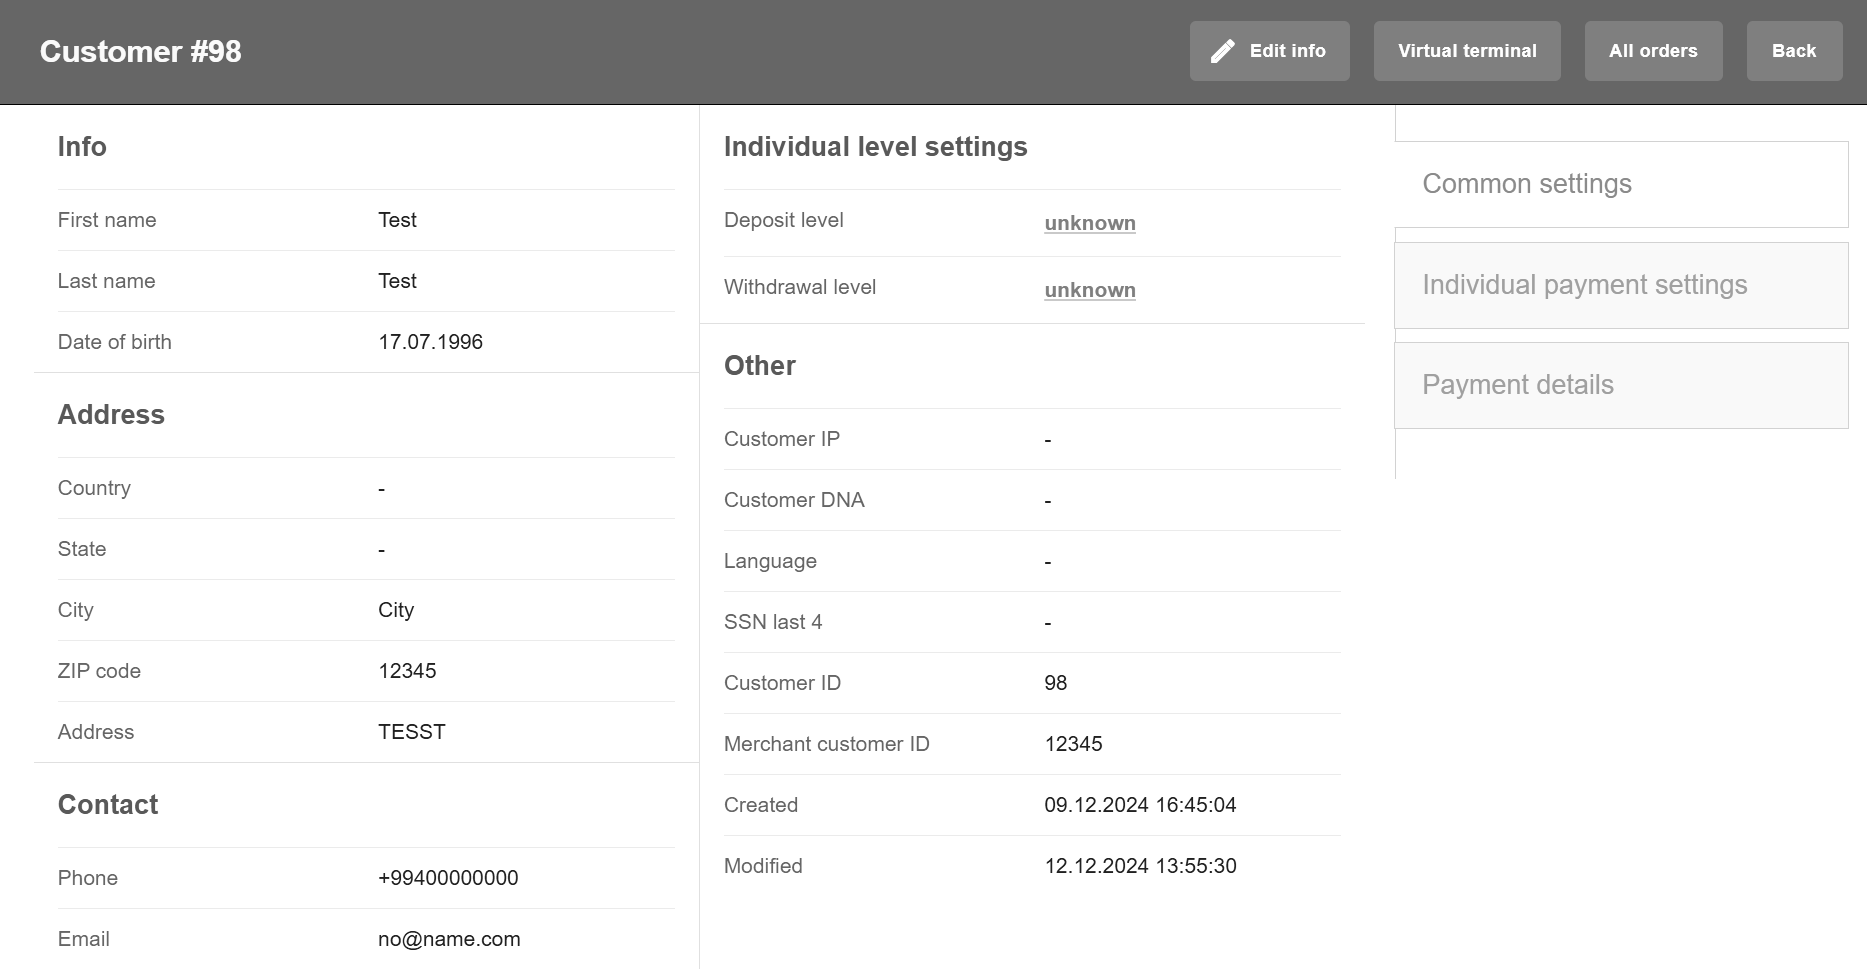
In Common settings all customer information will be shown. Under Actions menu, press Edit info to change customer information except Customer ID and Merchant customer ID. The Virtual terminal button will allow to open the virtual terminal with al customer information directly from this screen. All orders will show all orders associated with customer.
Individual Payment Settings
Individual payment settings allows to setup Cashier Payment Form for each customer separately. First choose level and currency for the setup. Then select Use as global limit for customer if min/max amount for currency should be applied for all available solutions . Select Payment methods and apply setup if needed. By pressing Virtual terminal button Virtual terminal with all customer information will be opened.